
For the past year I have been collecting pop tabs. Thousands of them. The reason? I am slowly making my first cosplay and I need chain mail to make it. But seeing as I am on a budget, well, recycling was the way to go rather than purchasing and slaving over the intricate wire rings used in proper chain mail.
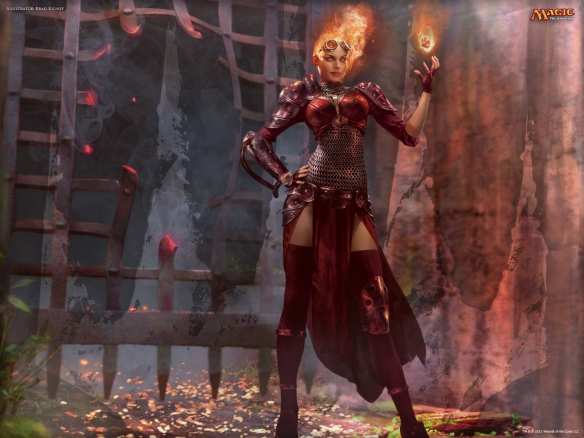
Above is Chandra Nalaar, a planeswalker from Wizards of the Coast’s game Magic: The Gathering. This is a game I have played for several years and thoroughly enjoy. I was never good at the game until I decided to switch to playing a “red” deck and a fell in love with Chandra as both a character and a planeswalker. So, I decided I would make a cosplay Chandra all on my own and finally attend a convention in an Emily built cosplay!
The first step to the cosplay, was to make the chain mail. I chose to do this first because I knew it would take a while and wanted to finish it before starting the rest of the pieces. Plus, since I decided to use pop tabs, I needed to collect the darn things! I am still not done creating the full chain mail piece, but if you want to learn how to make pop tab chain mail too, then read on!

Please note: While not explicitly mentioned below, gloves may be useful for this tutorial. Pop cans and pop tabs can be a lot sharper than you imagine. They also tend to give of small metal shavings which dig into the skin. So please use your best judgement as use safety precautions as necessary (I take no liability!)
Step One: Gather Your Resources (Pop/Soda Tabs)
Any regular shaped pop tab will work. If you want a uniform look, grab them all from the same brand. If you want a more realistic battered look, then let the shapes be a bit more random. That is what I chose to do, I mean, Chandra has battled before, so her chain mail would NOT be perfect. Hint: Some pop tabs may need a slight washing first, pop gets sticky!

Step Two: Tools
Pliers, wrench (or similar surface for bending, and scissors

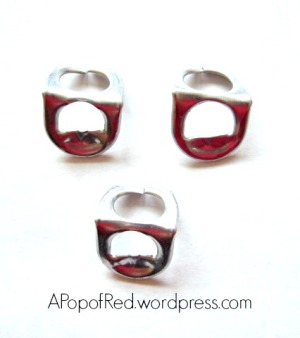
Step Three: Remove Sharp Edges
Pop tabs do not always rip off the can nicely. You can be left will the full hoop or jagged edges which can be dangerously sharp, like those shown in the first photo below. To remove the sharpness, use your plier and fold the sharpness towards the unfinished or back side of the tab. Then press your pliers down on the part that was sharp to “fuse” the metal closer to the rest of the tab making it safer. Your non-sharpened tabs should then look something like the third picture.


 Step Four: Cut the Tabs
Simply use scissors to cut into the upper/smaller end of the pop tab. Make the cut as central as possible.


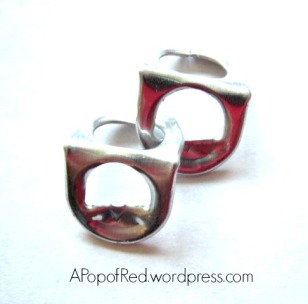
Step Five: Fold the Tabs
Using the wrench, or a flat surface with something to apply pressure with, bend the cut tabs to a “slightly less than 90 degree” angle. Alter the angle to your preferences but I try to get as close to 90 degrees as possible.

Step Six: Attach Tabs to Create Mail
Start with one tab. To attach the second tab bring it underneath the first tab’s right hand side (right when cut is facing forward). Push the uncut end of the second tab into the cut end of the first tab so it looks like the photo below.
An alternative view of the above shows how the cut ends are now positioned:

For the third tab, attach it to the first by bringing it underneath the first tab’s left side and proceeding as above. This is the basics of attaching pop tabs. The photos below show the three tabs attached.

Step Seven: Continue until Completion
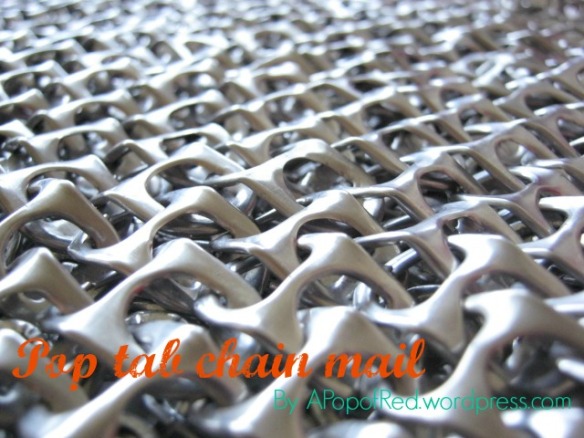
Sorry to say, but that is really all the instruction I can give. Attach the tabs as needed to create the design you want using the method explained above. A shirt will be made with different dimensions than a wrist covering.This process can be applied to more complex items too, like purses! Just tinker until you manage to create what you envisioned.
If you get stuck, send me a message or comment below and I will do my best to walk you through it!


Wow! That looks like it would take lots of patience! Great project – my boys would love it.
Thanks for sharing.
LikeLike
It can take patience but it isn’t so bad if you do smaller bits over a long period of time. And yes, I could see some boys getting excited for a project that creates armour! Thanks for the read.
LikeLike
How do you secure the backing? Every time I lift mine they keep seperaring, I’ve tried soldering them closed but the solder isn’t attaching to the aluminum even after following all of the instructions on how to solder…. My outfit is almost complete and this is the only issue I’ve faced…
LikeLike
Solder and tin/aluminum cans do not work well together. I did not have problems with the pieces separating but I would suggest using some glue to hold the cut part shut. Hot glue or a stronger glue would be the best bet but be careful. Wishing you all the best in finishing the outfit!
P.S. This post is now available on my new site: http://www.apopofred.com/pop-tab-chain-mail/
LikeLike